How To *Really* Clean A Single Serve Keurig
Written by Victoria Alexander in Cleaning Products, Cleaning Schedule, Cleaning Tips, Kitchen Cleaning Tips
Discover how to clean a Keurig single-serve coffee maker the right way with the help of another fellow Keurig lover/owner standing by your virtual side.
It wasn’t until I got a Keurig that I became a coffee casualty. Yes, coffee owns me and I’m not ashamed to admit it. Which is why I’ll do whatever it takes to keep my keurig running smoothly so that this good thing we’ve got going never ends. Ever.
Today, you’ll discover how to clean a single serve Keurig coffee maker, so that you never experience the heartache of nothing but spitter spatter coming from your beloved coffee maker. *The Worst*
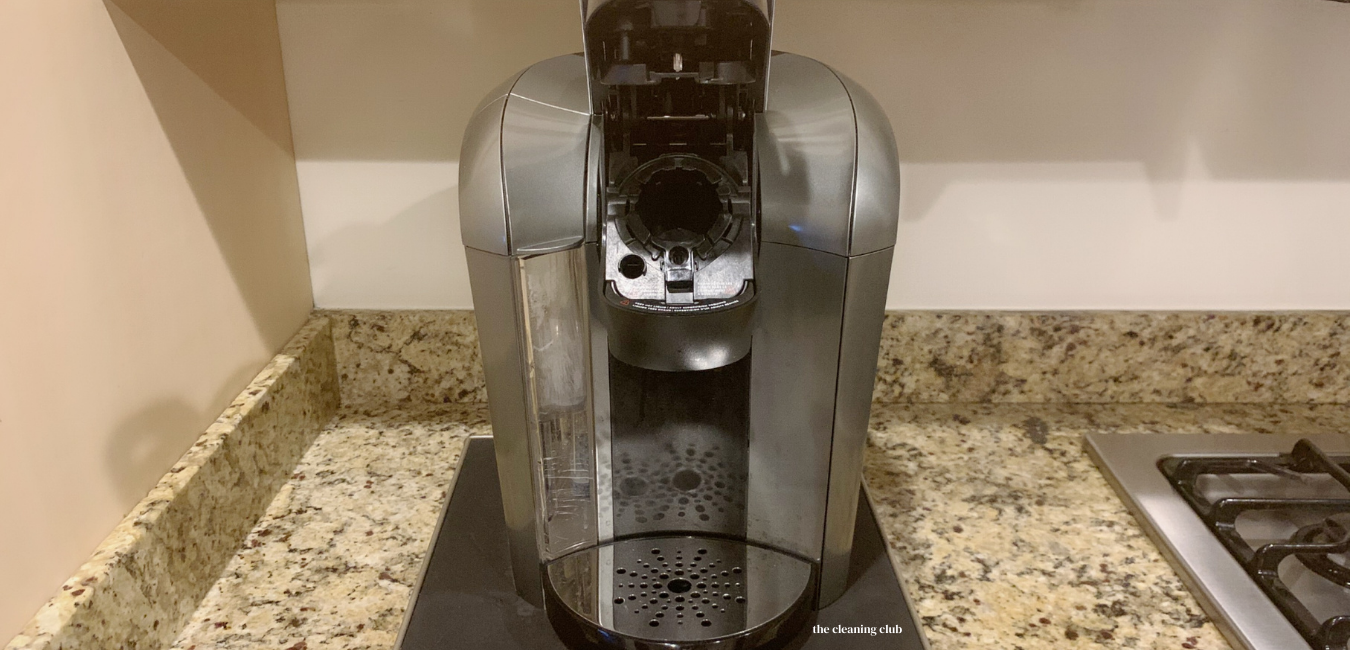
How To Clean Your Keurig Single Serve Coffee Maker *Quickie Weekly Cleaning Routine*
One of the things I love about having a keurig coffee maker is that it’s super low maintenance. Compare it to an old school coffee pot and the winner is obvious. When I think of *the office coffee pot* from when I was in the military I still get chills to this day.
Keep an eye on the mug plate. Coffee mugs go there to get rained on. Extra drips of coffee that come out long after you’ve swiped your coffee mug can stack up quick making it the obvious hot spot on your keurig.
What you’ll need
- One sink full of warm water & soap
- Two towels – one for cleaning and one to buff your Keurig dry so it doesn’t lose it’s shine
What to do
- Make some soapy water so you can wash everything.
- Unplug the Keurig. Unless you like living life on the edge.
- Wash the reservoir and then set it to the side. You’ll want to take the water filter out during this stage. I don’t know about you but getting dish soap in the water filter sounds like the perfect recipe for *yuck* coffee.
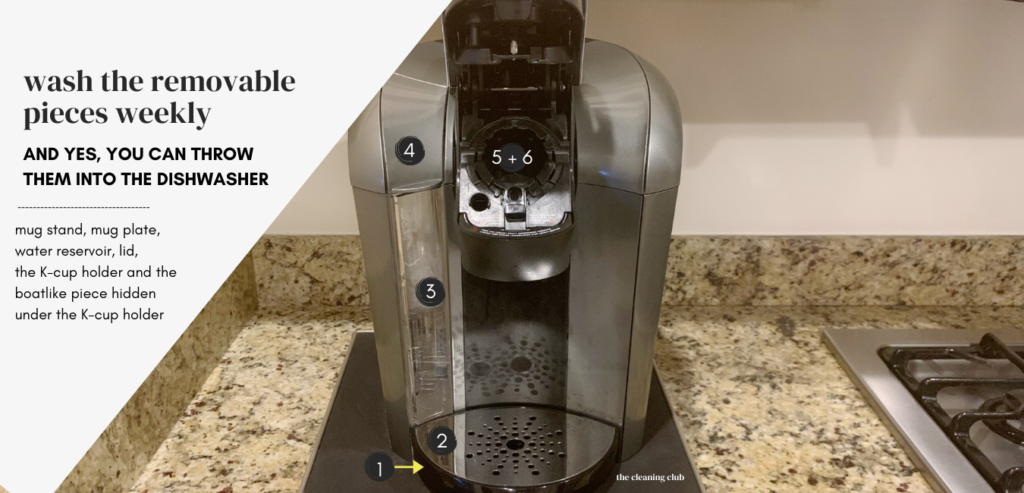
- Wash the rest of the removable pieces. Dry everything. Set them to the side. The other pieces depending on the type of Keurig you have should be the reservoir lid, mug stand, mug plate, the K-cup holder and the boatlike piece right under the K-cup holder.
- Wipe the Keurig surface with your cleaning towel. Buff it dry. Don’t forget to wipe the inside where the little coffee specks like to hang out.
- Return all the removable parts. Don’t forget to put the water filter back into the water reservoir. Add water to it then or whenever you’re ready to brew.
- Plug in the machine.
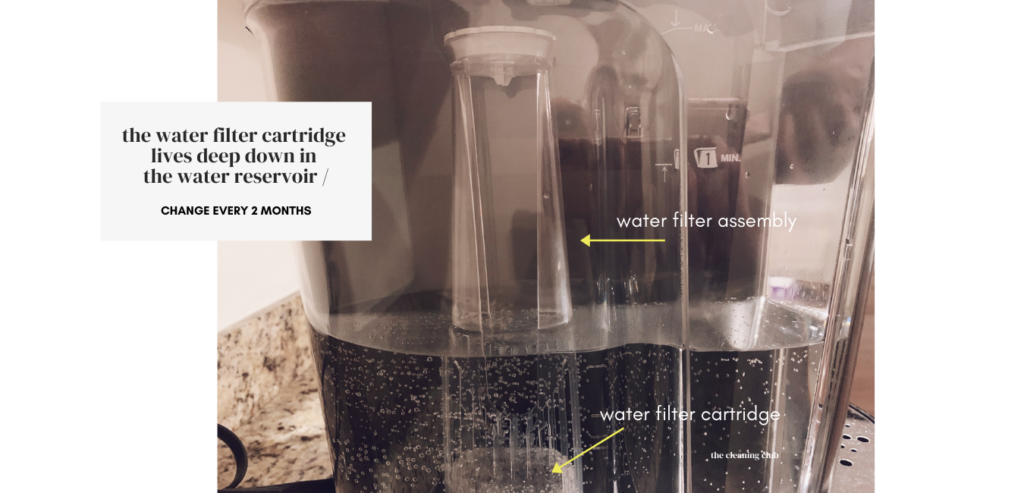
Change The Water Filter In Your Single Cup Keurig Every 2 Months For Chlorine-Free Coffee – Yummy
Coffee that makes the crowd go wild starts with good tasting water. Think about it. Water is the main ingredient in coffee. Bad tasting water equals trash coffee. No matter how rich and bodied your K-cups are.
AH-mazing water is simply water that’s not full of whatever creepy things live in unfiltered water. Keurig water filters specifically remove chlorine from your water. Not speaking from experience but I’m pretty confident pool water doesn’t make good coffee.
Keep your coffee extra bold and not full of extra impurities by changing those filters every 2 months. Or according to the Keurig site, every 60 tank refills.
What you’ll need
- Water filter pods
What to do
- Empty the water reservoir
- Remove the water filter assembly from the reservoir. May take gentle phenagaling to remove.
- Separate the bottom of the water filter assembly from the handle so you can access the *old* water filter. On the bottom of the handle, press in the tabs on both sides of the base at the same time and pull down to separate.
- Toss the old water filter cartridge. Bye-bye.
- Insert the new water filter cartridge into the assembly *after* you’ve soaked it under running water. The filter will come with instructions so follow them. Insert the filter cartridge in the bottom of the handle assembly.
- Put the bottom back on the assembly and place it back inside the reservoir. Be sure to push down firmly – all the way down – to make sure everything is nice and secure.
FYI, Descaling Your Keurig Single Serve Coffee Maker Isn’t Quick
Ok this is the fun part. But not really. Descaling your Keurig is something you have to do to keep your coffee flowing smoothing and tasting heavenly. The descaling process is how you really clean your Keurig.
And to be honest, it’s very easy to do. But. I’ll be up front and let you know you need time and a endurance to see the descaling process through.
Basically, don’t do this on a whim.
Maybe I’m jaded because I was caught off guard with how long everything took. I decided to descale my keurig 2.0 at 11:30 pm thinking it would be as simple as pushing a button and walking away. But that’s not quite how it works.
Descale Your Keurig Single Serve Coffee Maker Every 3-6 Months For a Long, Rich Life & To Fix Issues
Ever heard your Keurig make a choking noise? Or just stopped putting out all together? A number of things could be happening inside your machine. However, buildup is more than likely the issue which means descaling is probably going to be your fix.
According to the Keurig website, descaling your Keurig coffee maker is a necessary process that removes calcium deposits, or scale, that can build up inside a coffee maker over time. Calcium and scale are non-toxic, but left unattended, they can hinder your brewer’s performance.
Descaling should take place every 3 to 6 months to preserve long-term health of your brewer.
How To Descale Your Keurig Single Serve Coffee Maker (*How to REALLY* Clean The Inside)
READ THIS – Descaling your Keurig is a 2-part process. The quickie cleaning routine I outlined above comes first. Once that’s done, you can slide straight into the descaling process. If you *really* want to clean your Keurig, THIS is how you do it:-)
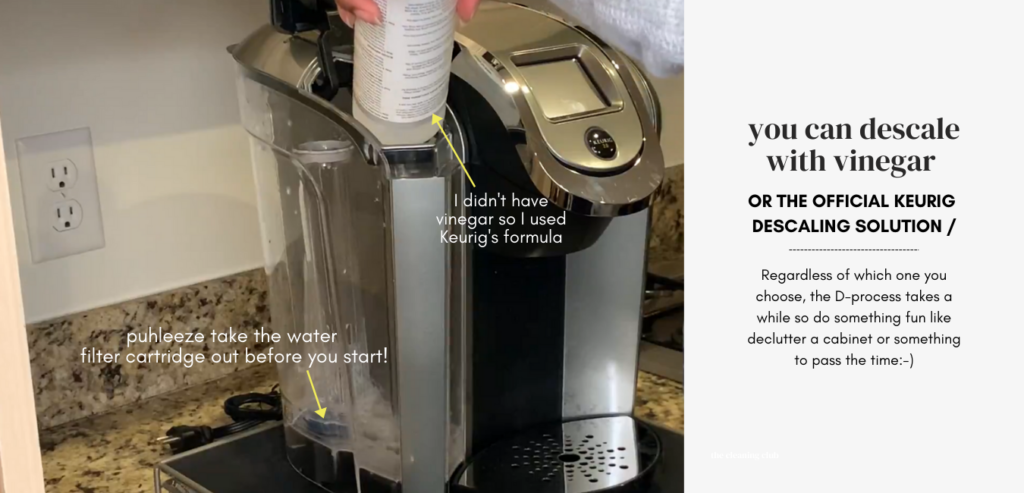
The ONLY thing I’d do differently than the instructions on the Keurig website is leave the water filter out during the descaling process. I’m not saying you have to. I just think it’s weird to leave it in. The thought of the water filtier holding onto traces of whatever I descale my keurig with terrify me.
You’ll need
- White vinegar or descaling solution
- Bottled water
- One large coffee
- Time
Start with freshly cleaned, empty Keurig (no water and no pods inside)
OPTION 1: Descale your keurig with white vinegar:
- Unplug the machine.
- Add equal parts vinegar and water to your water reservoir. I didn’t use this method, but from what I’ve read, most people are filling the reservoir half way with water and then the other half with vinegar.
OPTION 2: Use the Keurig descaling solution. I had a bottle on hand so that’s what I used. When I nervously test-tasted a cup of coffee at the end of the descaling process, it was indeed delicious!
Here are the rest of the instructions to follow regardless of which option you choose to clean your single cup Keurig:
- Plug the Keurig up and press the power button to turn it on
- Disable the *auto off* setting
- Place the large coffee mug on the mug plate
- Start the brew cycle without inserting a K-cup.
- Repeat until the reservoir is empty. Give your pointer finger a pep talk because it’s about to be tested in the cruelest way. You have to push the *brew button* after each cycle completes in order to run the descaling solution through the system. This might be anywhere from 10-15 times.
- When your Keurig warns you that more water needs to be added PAUSE
- Let your coffee maker sit for 30 minutes. Don’t empty the reservoir. The solution simply needs time to continue working its descaling magic.
- Empty the reservoir & fill it with fresh water so you can flush the system of the descaling solution. This step is how you make sure your coffee won’t taste chemically or vinegary so don’t take this 2nd round lightly. Oh and do switch fingers this time. Your poor pointer will have already gone through enough.
- Start the brew cycle without inserting a K-cup.
- Repeat until the reservoir is empty.
Can I use distilled water in my Keurig coffee maker?
No. Or maybe. It depends.
When cleaning your single-serve Kuerig, we advise against the use of distilled water as it can make the coffee taste flat. Moreover, since distilled water contains no minerals, your coffee maker may not be able to detect water in the reservoir and the “add water” light will remain on. That’s a straight copy & paste from Keurig.
But according to other blogs, you can use distilled water in classic keurig machines, just not in the Keurig 2.0. So as you do your research, just note that *the official source* and the internet experts are at odds on this one.
Should you actually clean your Keurig 2.0 with vinegar?
Acidity from chemicals like vinegar can actually damage the inside of your coffee maker. So if you’re going to use vinegar, do so at your own risk. Again, that’s a copy & paste from Keurig.
Personally, I think it’s ok as long as you don’t use it often. Keurig really boxed us in when they said the only descaling product they approve is their own but on the flip side, we know it works so I’d definitely recommend swiping the Keurig maintenance kit that has everything you need to maintain your Keurig from top to bottom.
Got foam coming out of your Keurig coffee maker?
It’s a 100% natural reaction between the cleansing solution and scale (via Keurig). This is more likely if a coffee maker has a lot of build-up, which may prevent the descaling solution from properly filling the brewing system. Continue to clean your Keurig as usual. You’re not damaging it.
Nothing coming out of your single serve Keurig?
If this happens, turn off your coffee maker. Empty and thoroughly rinse any remaining descaling solution in the tank and then refill it with fresh water. Reconnect your brewing system, turn it on again and repeat.
One More Thought /

Your single serve Keurig is undeniably more important than vitamins so do the right thing and keep her clean. Use the right products, do your quickie cleanings regularly and your deep cleanings on time to keep your Keurig happy, coffee full of dark magic, and you a productive member of society.
And to clarify, I mean good dark magic – like chocolate and Idris Elba. Not Voldemart kind of dark magic.
Now, if you’re really in the mood to clean random things around the house, head on over to my post, How to clean a flat screen tv so that it’s streak-free. Because the big screen is no place for a smudge to hang out.
Good things are meant to be shared! Save this to your Pinterest account so you can actually find it later and so others can see you’ve got all the good stuff!

I’m so glad you stopped by today!

The Mini Home Management Kit